All sensors for building our perception system, which include two Point Grey Grasshopper cameras for stereo vision and one Delphi ESR 2.5 radar, are successfully mounted on the testing vehicle.
Considering other crucial tasks that demanded more progress and the amount of time already consumed in designing and fabricating the water-proof camera housing, the team decided to pursue a different plan from our initial mounting solution: instead of fixing both cameras on the mounting rack above the roof of the testing vehicle, the cameras are now fixed in front of the windshield inside the vehicle. More specifically, the current camera fixture is composed of two side supports and an 80/20 aluminum beam. The supports are installed on the testing vehicle at the location where the two sun visors were originally attached to the vehicle. Therefore, both sun visors and their fixture were removed in advance. Currently, each camera is mounted inside our customized camera housing, and the two housings are rigidly attached on the 80/20 beam hung over the dashboard by the two supports. The picture below demonstrates the on-board setup of the cameras that is illustrated above:
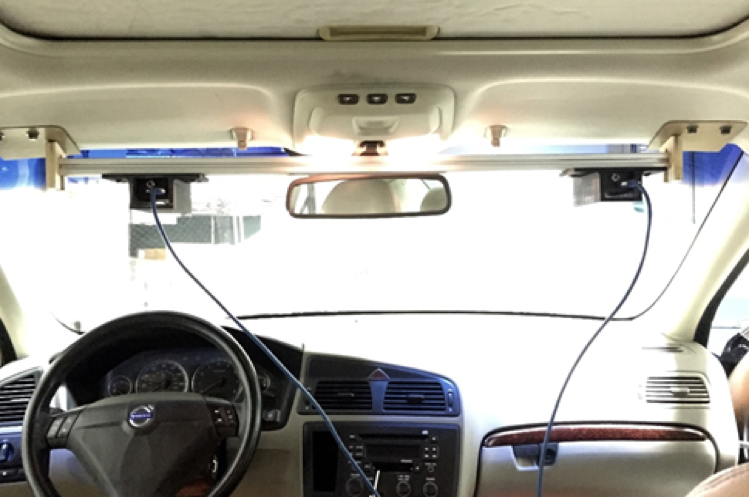
Figure 1. On-board setup of the cameras
Note that the current mounting structure of the cameras is placed inside the vehicle, it eliminates the need for developing a more advanced weatherproof camera housing while still satisfying the weather-proof requirement of our perception system at the same time.
As for the onboard setup of the Delphi ESR radar, it is mounted in front of the vehicle’s grille which is about 50 cm above the ground, right on the vehicle centerline. Recalling from the Delphi ESR user manual that the radar’s mounting location should be between 300 mm and 860 mm from the road surface, we figured out that the current mounting location would be the ideal one after taking the front exterior of the testing vehicle for reference.
The radar is mounted on the grille using three identical fixtures that are self-designed and 3D-printed. Each fixture can be inserted into the vehicle grille. The two hooks on each fixture can clamp the fixture to the grille from the back. The radar can be then attached rigidly with the fixtures using M6 screws and locknuts so that it is also attached rigidly on the grille and the vehicle.
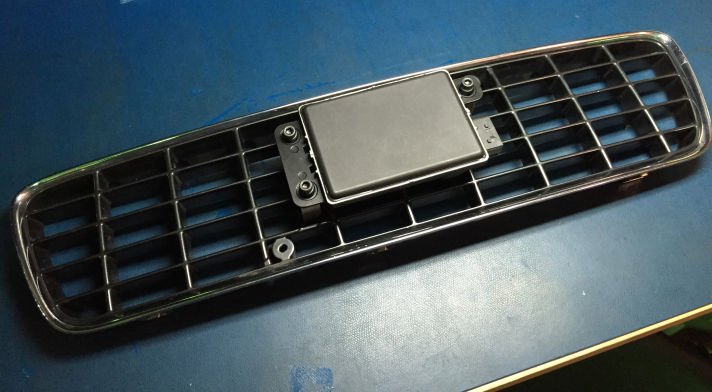
Figure 2. On-board setup of the radar